
Support has been notified that PowerSyncPro Azure Marketplace images deployed with the v3.1 image do not allow access to the SQL database for backend access or upgrades to v3.2. This issue will be resolved with the v3.2 Azure Marketplace image. Follow this process if you are running an Azure Marketplace image and do not have access to the backend database.
This process involves stopping the PowerSyncPro Service and SQL Server, bringing up SQL in Single-User mode, and adding the local administrators group to the SQL database as an administrator.
⚠️ Important
- These steps require local administrator access on the PowerSyncPro server.
- PowerSyncPro will be inaccessible while performing this process.
Step 1: Stop the PowerSyncPro Service
- Open Services (
services.msc) - Locate PowerSyncPro
- Right-click the service and select Stop
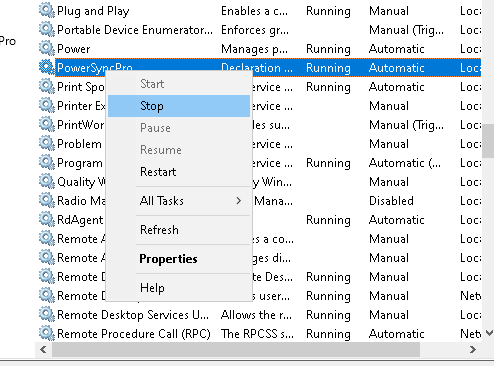
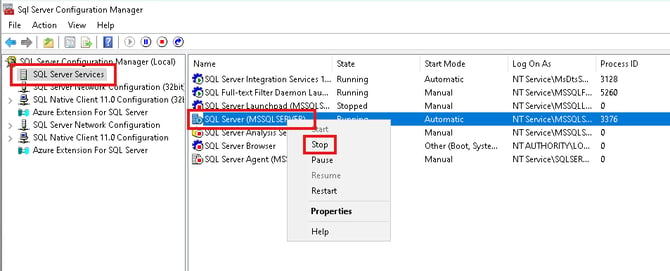
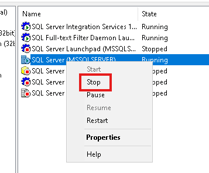
Step 2: Open SQL Server Configuration Manager, Stop SQL
- Launch SQL Server Configuration Manager
- Navigate to: SQL Server Services
- Find your SQL Server Instance, ex. SQL Server (MSSQLSERVER)
- Right Click, Select Stop
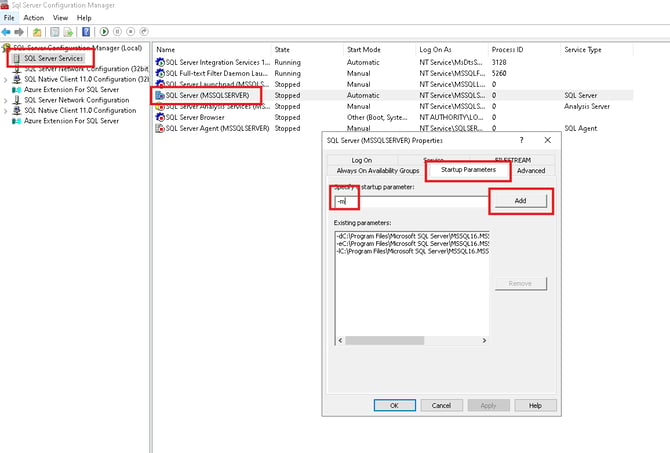
Step 3: Start SQL Server in Single-User Mode
- Find your SQL Server Instance, ex. SQL Server (MSSQLSERVER)
- Right-click the instance and select Properties
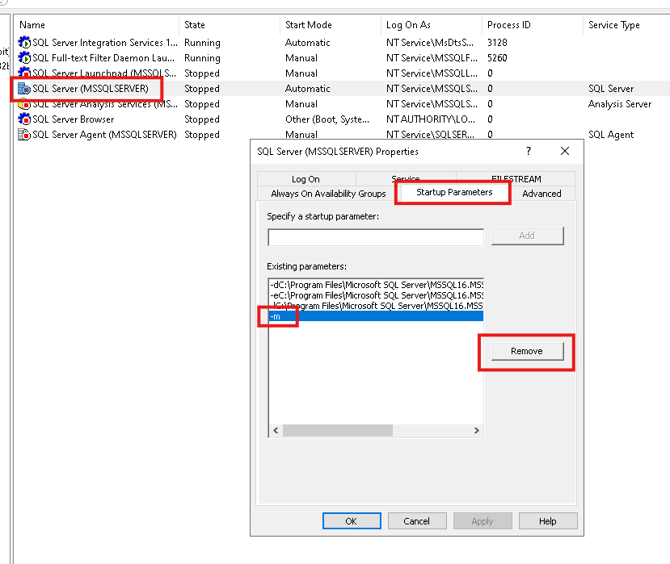
- Open the Startup Parameters tab
- Add the following parameter: “-m”
- Click OK
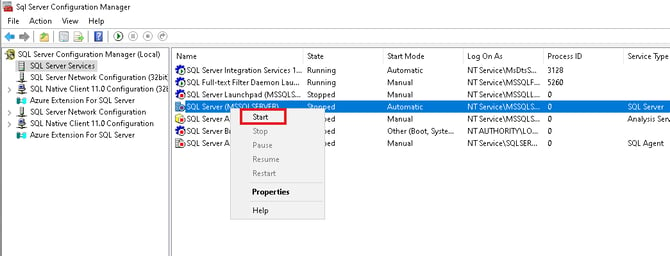
Step 4: Restart the SQL Server Service
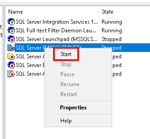
- Right-click the SQL Server instance
- Select Start
SQL Server is now running in Single-User Mode.
Step 5: Add Local Administrators as SQL Sysadmin
- Open an elevated Command Prompt / PowerShell (Run as Administrator)
- Run
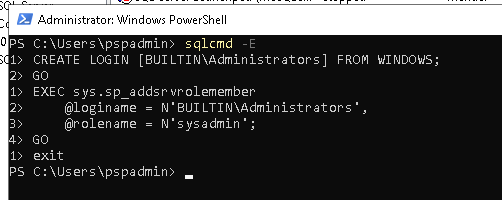
sqlcmd -E - Run the following commands:
CREATE LOGIN [BUILTIN\Administrators] FROM WINDOWS;
GO

EXEC sys.sp_addsrvrolemember
    @loginame = N'BUILTIN\Administrators',
    @rolename = N'sysadmin';
GO
This grants all local administrators sysadmin privileges in SQL Server.
- Exit SQLCMD
- exit
Step 6: Remove Single-User Mode
- Return to SQL Server Configuration Manager
- Stop the SQL Service
- Open Properties for the SQL Server instance
- Remove the
-mstartup parameter - Click OK
- Start the SQL Service
 Stop SQL Stop SQL
|
 Remove Single User Mode Parameter Remove Single User Mode Parameter
|
 Start SQL Start SQL
|
Step 7: Start PowerSyncPro Service
- Open Services (
services.msc) - Locate PowerSyncPro
- Right-click the service and select Start
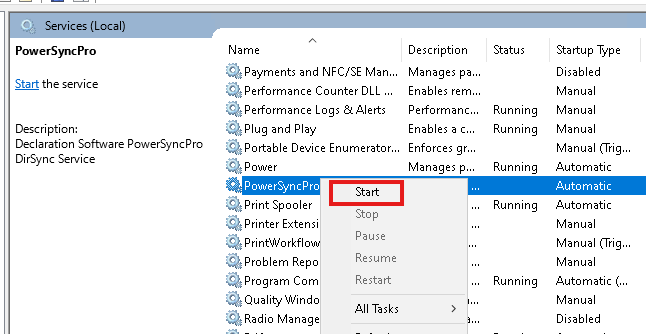
Step 8: Verify Access Using SQL Server Management Studio (SSMS)
- Launch SQL Server Management Studio (SSMS)
- Connect using Windows Authentication
- Log in with your current user credentials
- Ensure that “Trust Server Certificate” is checked.
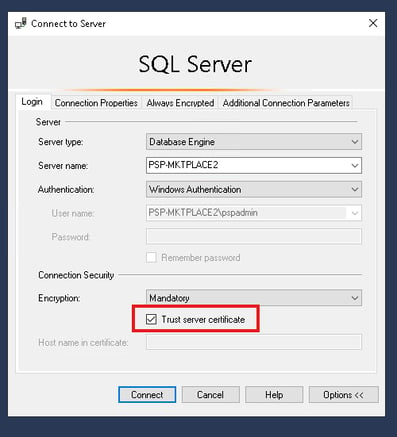 Login to Database Using Current Credentials Login to Database Using Current Credentials |
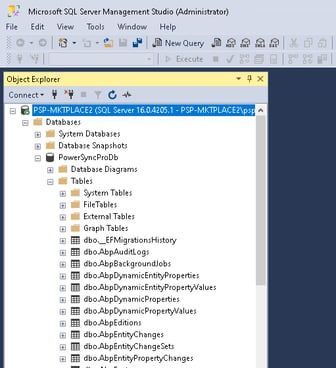 Access Confirmed Access Confirmed
|
Step 9: Verify PowerSyncPro Access
- Launch PowerSyncPro in browser and confirm access / login.
Complete
The process is complete. Your local administrators on the server should now have access to the database. Upgrades of PowerSyncPro to newer versions should be successful.